One of the great things about art and design is being able to take inspiration (and instruction) from pretty much anywhere. But once the flint of the imagination is struck, and the design goes from nebulous to (mostly) concrete, the build begins.
The owner of the salon wanted something similar to this (but not quite as static) and in looking around for things that would be more harmonious with his current, yet evolving, decor I found this.
I took that idea and ran with it as hard as I could. Being a fiber artist, the use of quilting hoops was immensely appealing. Being a science geek, I loved how the lines invoked the atomic symbol in my brain. And being an ambitious little cuss, I thought - why just one shell? How about three sets of hoops to make three nested spheres of movement and loveliness?
I (re-)learned while building this piece (and Code:AVANI) that nothing happens quickly in woodworking. Like most natural materials, wood absolutely will not be rushed - and prep work is absolutely critical. Prepping the surfaces carefully and with attention to detail are pretty much the only things you can do to make wood look amazing - and there are no short cuts.
After oodles (and oodles) (and oodles) of sanding, I needed to stain the three sets of hoops - while the natural wood is pretty, it didn't work well with the client's current and evolving decor. I experimented with an all-natural, kitchen-chemist steel wool and vinegar stain, originally. But it didn't give the effect I wanted, so I went back to tried-and-true Minwax in English Chestnut (for the outside surface) and Red Chestnut (for the inside).

The hoops stained, stacked carefully on our table to dry. This is pretty enough on its own to inspire some other pieces brewing in my brain currently.
Once the stain was set, I needed to attach the hoops to the central structure. The fact I was using 3 concentric levels made this problematic when it came to the "clamping" part of the adhesive process. I started with these three hoops on the central stalk, then realized I did NOT have the proper tools for this. Even with extra-long C-clamps, there wasn't enough room for them to be set and supported properly. My salvation was in the Sears hardware section...

This one time, at band clamp...
Once I got the proper tools I was able to put it all together all at once. I think I might do something different next time I make something similar. Balancing was a royal pain, so change #1 will be to enlist another set of hands...
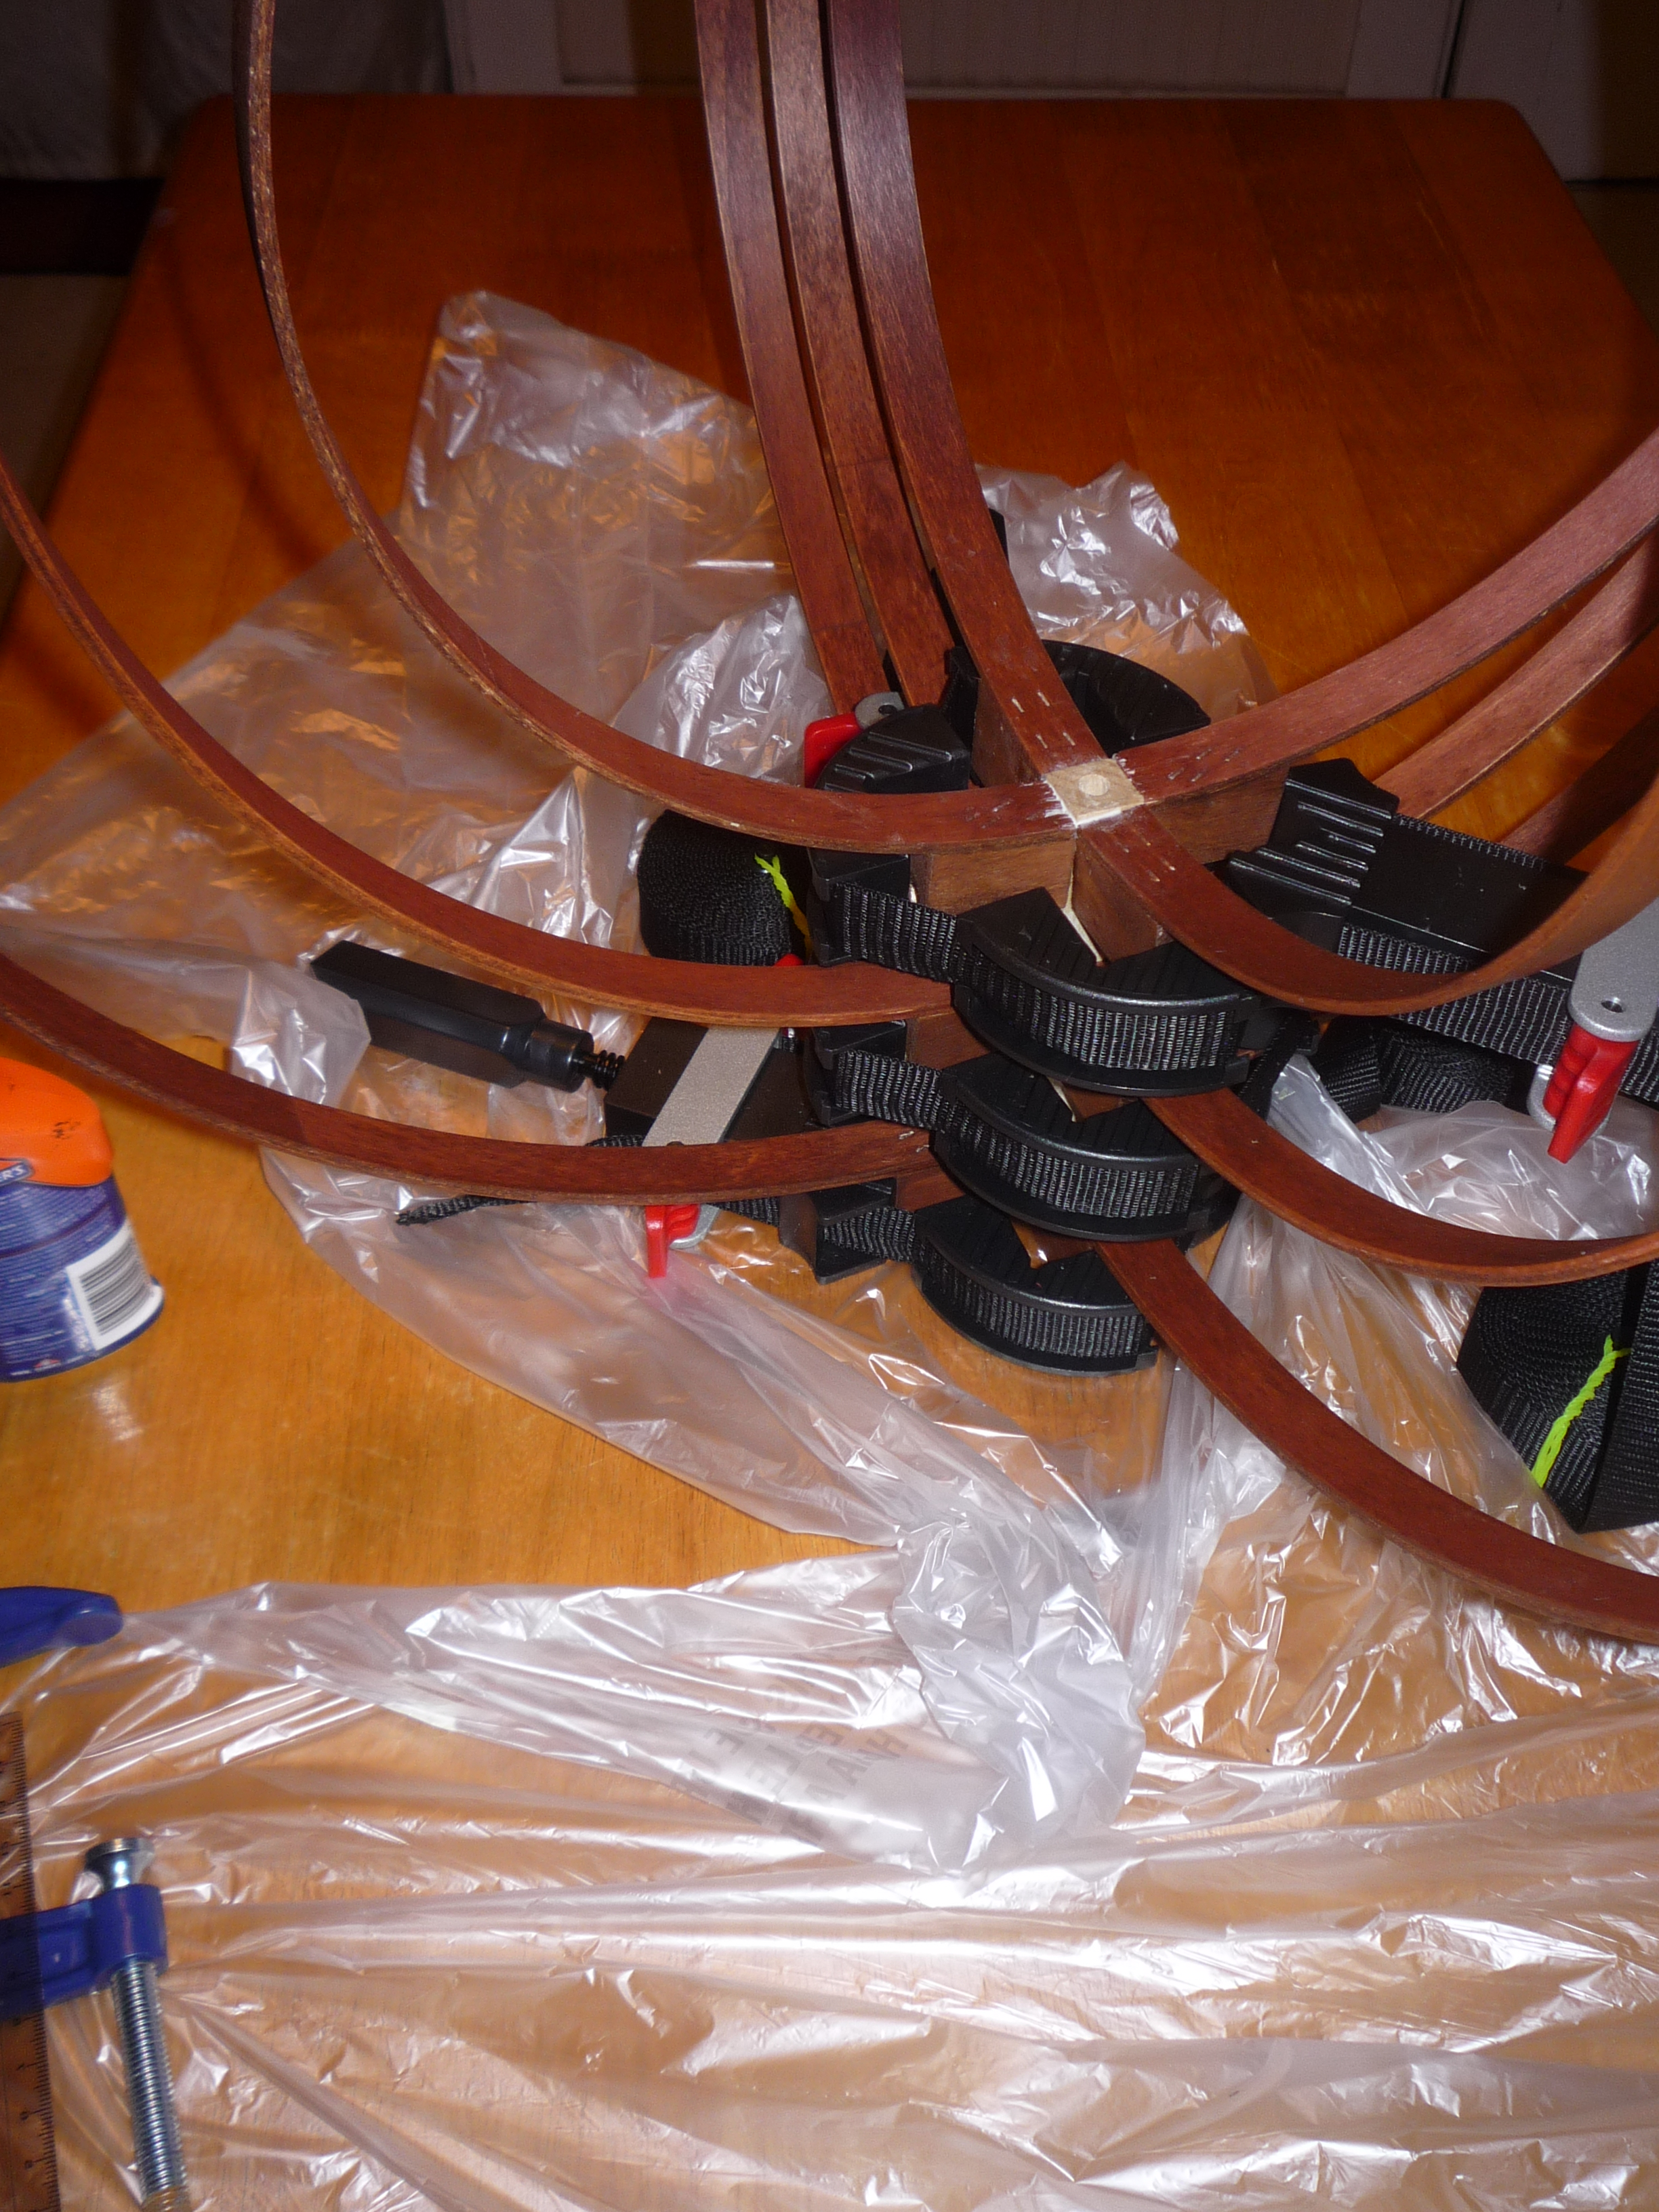
(center strut is unstained at this point b/c the adhesive needs clean surfaces)
Once the glue in the support structure was dry I was able to add in the "interesting", non 90-degree parts of the sculpture. Once all the shells were in, I placed a few nuts and bolts at some strategic joints. I didn't want to secure all junctures because I wanted the ability to shift and move the inner hoops relatively freely.

After that, it was a matter of threading the store-bought socket kit (as opposed to the ones I built for Code:AVANI) and installing it.
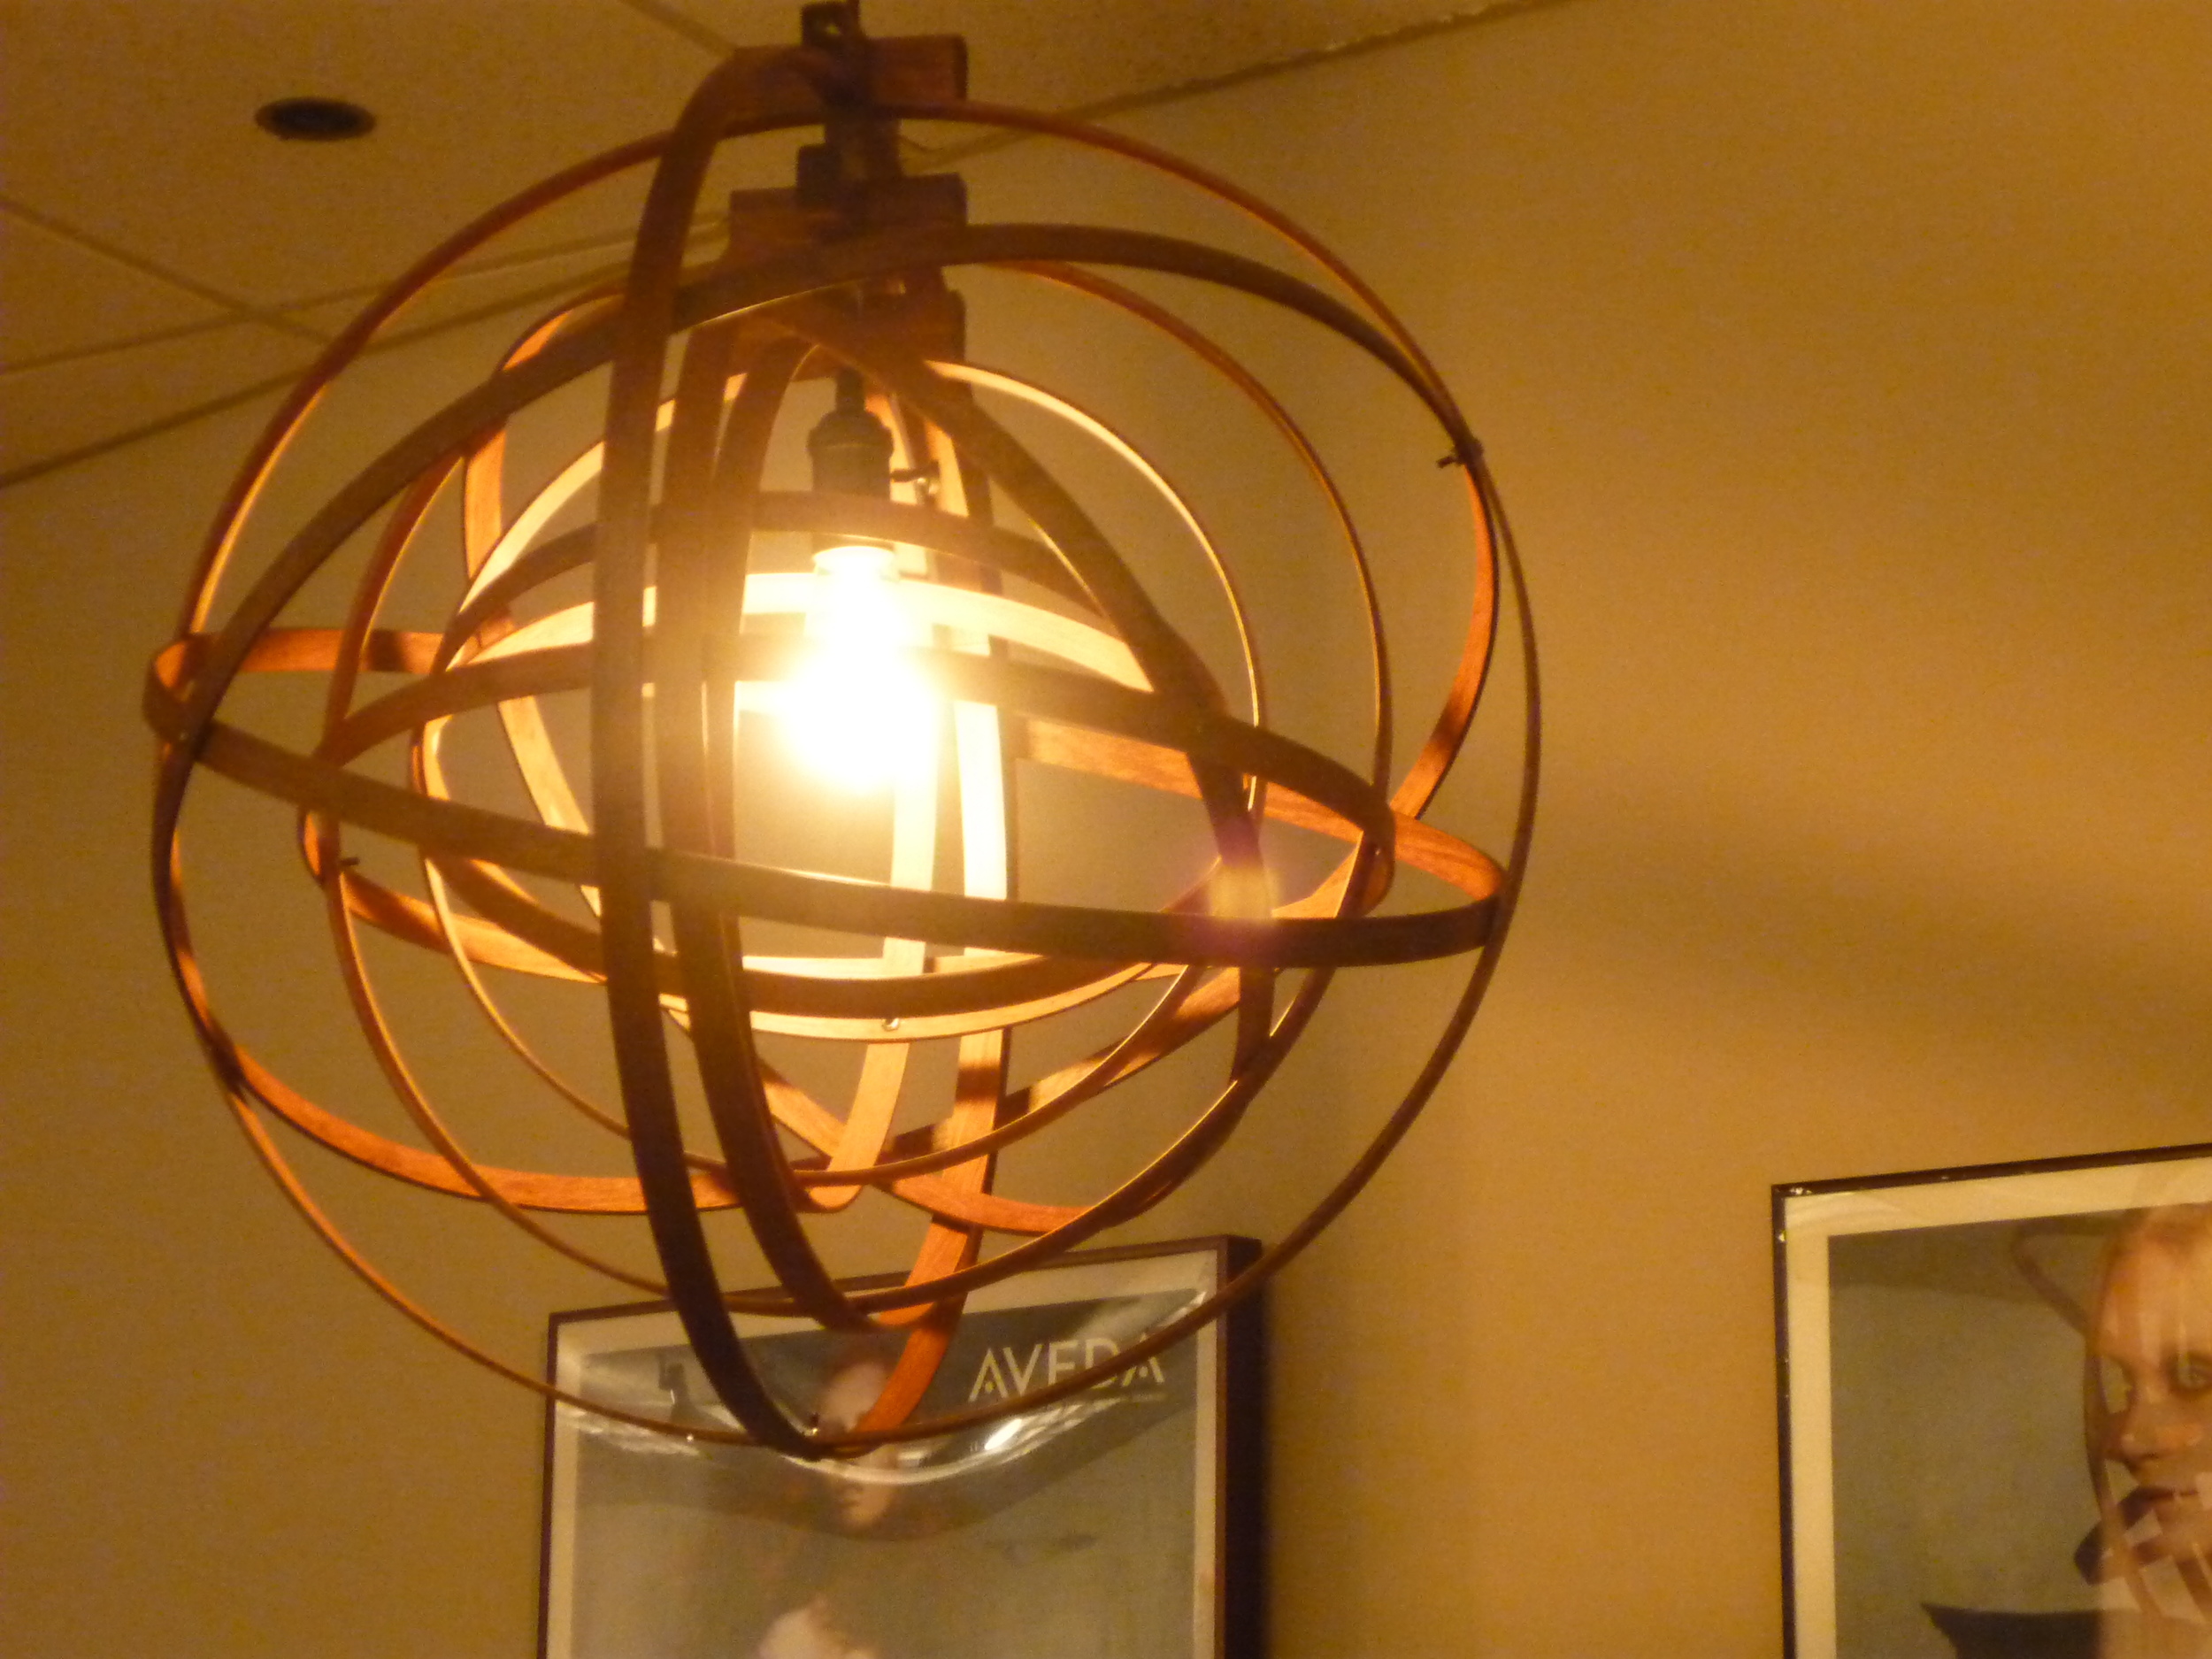
Ta-da!
Yeah, I'm pretty proud of this one. These pictures really don't do it justice - I'll fix that soon, I hope.